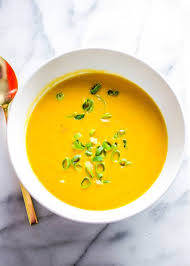
Creamy Butternut Soup
 (gluten-free, paleo, Whole30, vegan options)
This easy, healthy recipe is warming and filling. I often make it several times a month through the fall and winter – with coconut milk, no pecans and no jalapeño to suit my son’s taste, and full spices and garnishes when its just for me. This recipe is very forgiving; feel free to adjust the amounts of ginger, jalapeño, veggies and cream based on what you have on hand and to suit your taste.
Creamy Butternut Soup Ingredients:
Handful of pecans, for garnish (optional)
4 TBS (1/2 stick) unsalted butter (or vegetable or coconut oil if vegan)
2 medium leeks, white parts only, carefully washed and coarsely chopped (or yellow onions, shallots, or even scallions in a pinch)
1 cup coarsely chopped celery stalks and leaves
2 medium carrots, coarsely chopped
1 inch fresh ginger, peeled and roughly chopped
1/2-1 fresh jalapeño, seeded and roughly chopped (optional)
1 medium butternut squash (~ 2 lbs), peeled, seeded and cut into rough cubes
4 cups chicken stock, preferably homemade, or water, or veggie stock
½ cup light cream or ½ and ½ (or coconut milk if vegan)
salt and fresh ground pepper to taste
Method: How to make Creamy Butternut Soup
- (optional) Preheat oven to 375 F
- (optional) Spread pecans on a baking sheet and toast in oven for 5 minutes. Let cool slightly, then chop finely. Set aside.
- In a soup pot over medium heat, melt the butter. Add the leeks, celery, carrots, ginger and jalapeño and sauté 15 minutes, until wilted.
- Stir in the squash and stock and bring to a boil. Reduce heat to medium low, cover and simmer for 20-30 minutes, or until all veggies are very soft.
- Let cool slightly, then puree in blender or with immersion blender until smooth.
- Return the puree to the pot and stir in the cream. Heat through, but do not allow to boil.
- Season with salt and pepper. Ladle into individual bowls, sprinkle with pecans, and serve.
Superfood Honey, Walnut and Sesame Balls
These healthy treats are modified from a recipe from my favorite Chinese medicine  cookbook, Ancient Wisdom, Modern Kitchen. In Chinese medicine, walnuts and sesame seeds (especially black ones) nourish the Kidneys and support the “essence” while honey is sweet and moistening to the Lungs and digestive system. Together, these superfood ingredients can benefit lung function, constipation, and insomnia in the short term, and when taken long term, can help with hair growth, libido, sleep, fertility and back pain. Warming spices further benefit the digestive system.
Superfood Honey, Walnut and Sesame Ball Ingredients:
- ½ cup black sesame seeds
- 1/3 to ½ cup chopped walnuts
- 3-4 tablespoons honey
- Warming spices (optional): 1/8 – ¼ teaspoon ground cinnamon, ginger as well as cardamom, nutmeg, fennel, cloves, etc. to taste
Method: How to make Superfood Honey, Walnut and Sesame Balls
- Roast the sesame seeds and walnuts in a cast iron skillet over medium heat for 5 minutes or until the seeds and nuts become fragrant, stirring occasionally to avoid burning. Transfer to a bowl and allow to cool.
- In a food processor combine nuts and seeds with honey and spices and blend until completely mixed. Adjust spices as desired.
- Roll into ½ – ¾ inch balls. If the mixture doesn’t stick together at first, add more honey and mix again until incorporated. Roll in additional sesame seeds if desired.
- Take 1 to 3 before bed as a nourishing treat!
Caffeine-free Golden Milk Chai
This is a warming and nourishing drink for any time of day. The spices have anti-inflammatory effects, and with the addition of a teaspoon or two of ghee, it is especially soothing right before bed. I recommend this to post-partum mothers with whole milk or coconut milk and plenty of ghee to gently warm and nourish their digestive systems and provide healthy fats. It makes a healthy special treat for young children as well. You may also add 2-3 black tea bags for a more traditional caffeinated chai tea. As with most of my recipes, the ingredients are versatile, so feel free to play with the suggestions and make it your own. Serves 3-4.
Caffeine-free Golden Milk Chai Ingredients:
1-2 cinnamon sticks
5 cloves
5-10 peppercorns
dash of nutmeg
1 tsp whole cardamom seeds (no skins)
1 inch chopped fresh ginger
1/2 inch chopped fresh turmeric, or ¼-1/2 tsp ground turmeric.
2-3 cups whole milk, coconut milk, almond milk or other alternative
ghee or coconut oil
Method: How to make Caffeine-free Golden Milk Chai
- Add spices to 2-3 cups water. Bring to a boil, and simmer down to 1 cup over 15-30 minutes.
- At this point, the spices can be strained and the spiced concentrate can be refrigerated for up to a week for future use.
- When ready to serve, add milk and bring back to a boil.
- Serve warm. Add honey or maple syrup for sweetness to taste and 1-2 tsp. ghee or coconut oil per cup.
- Enjoy!
Immune Support Elderberry Syrup
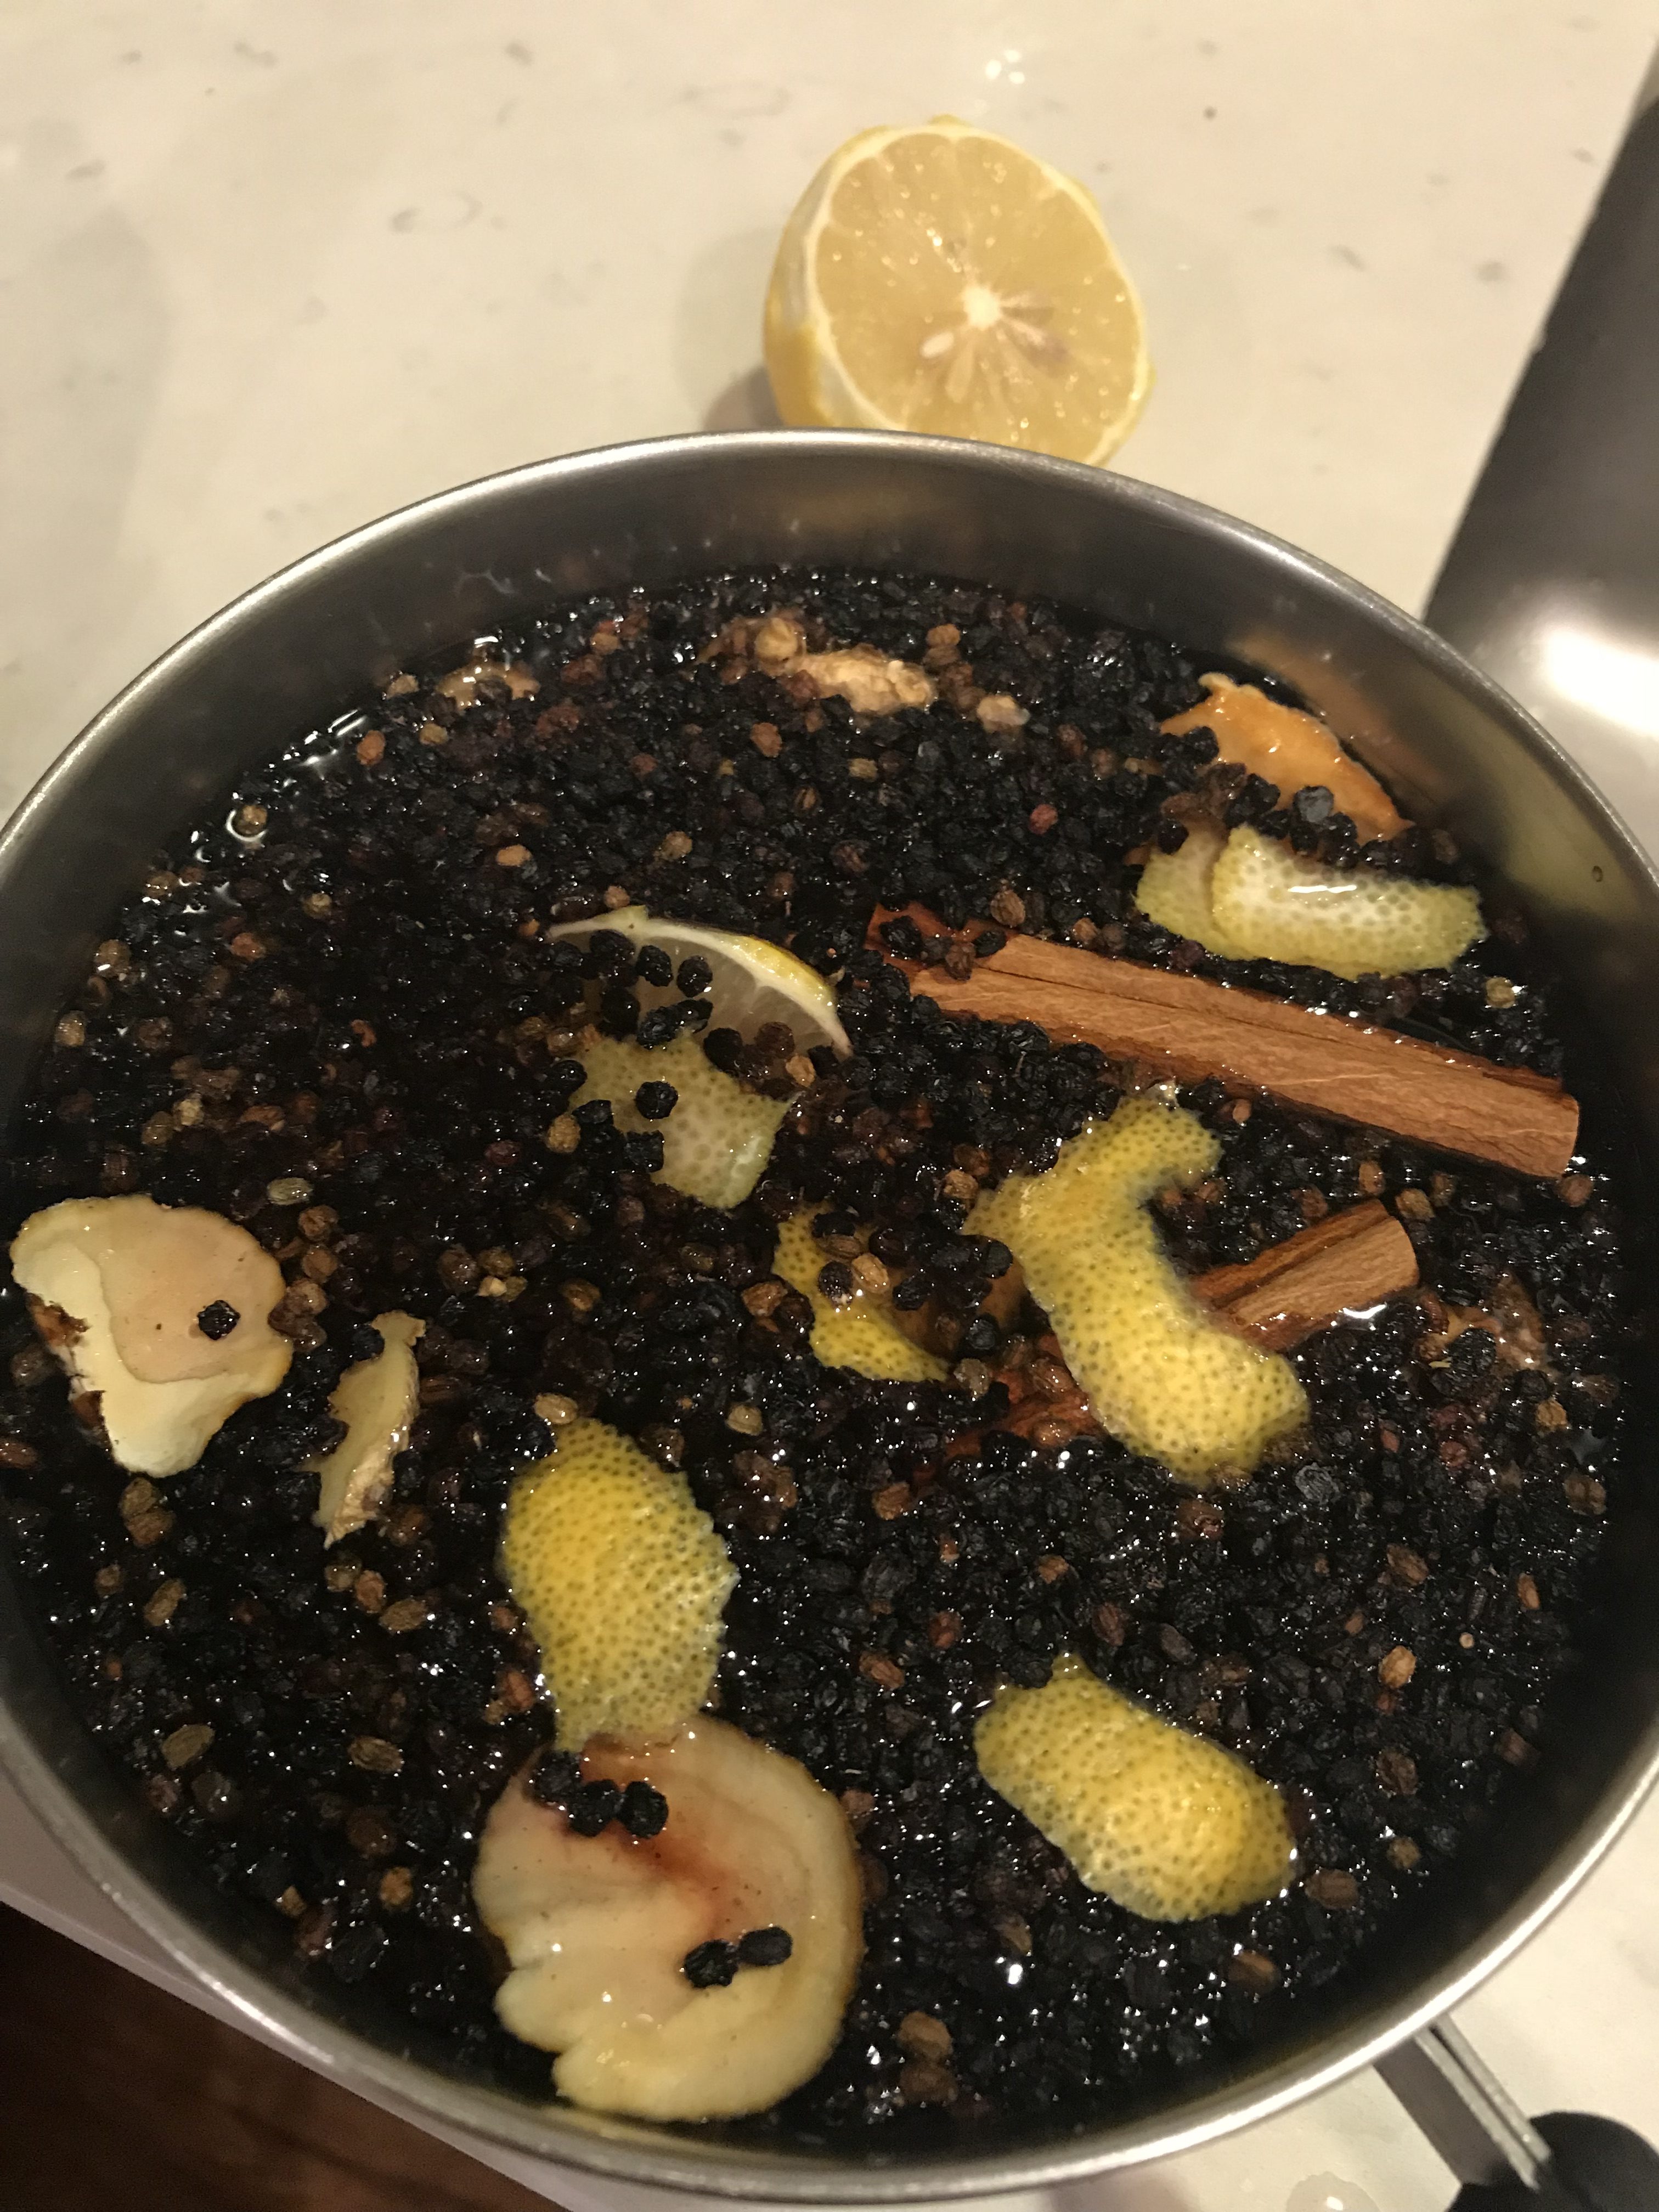
Elderberry syrup is best known for its ability to fight colds and flus. Packed with antioxidants and bioflavonoids, elderberries have many other health benefits as well. Widely available in the “health food” market, I have been pleasantly surprised with how easy and relatively inexpensive it is to make my own elderberry syrup and control the ingredients.
The basics of the recipe are simple: simmer elderberries in water for about an hour or until reduced to about half, strain, and then mix in some raw honey to taste. That’s it. Nothing to be intimidated by, right?
Like all my recipes, this one is fairly flexible. I have made homemade elderberry syrup both on the stovetop and in my Instant Pot. I like to add a few other ingredients for flavor and to enhance the immune boosting effects. I usually just go with cinnamon, ginger, cloves and a lemon if I have one, but have played with all of the add-ins below with good results. Other people add turmeric, garlic… the possibilities are endless!
I also keep a jar of elderberries steeping in vodka in the closet, since alcohol extracts different constituents from the berries than water does. I usually add a few dashes of this tincture to a batch of syrup to act as a preservative.
I try to avoid added sugars when possible, but the berries themselves are very tart, so this recipe does require some sweetener to make it palatable. Some people use maple syrup, but I like raw, local honey for its additional antiviral benefits (see this study). Feel free to play with the amount and type of sweetener that works for you. Just remember that honey should not be given to infants under 1 year old.
Elderberry Syrup Ingredients:
1 cup dried elderberries (available on Amazon, or locally at Rebecca’s Apothecary or Whole Foods or Natural Grocers)
4 cups water
1 cup honey, preferably raw and local
optional add ins:
1-2” knob of fresh ginger, or 1 tsp ground ginger (gan jiang in Chinese medicine)
1 tsp cinnamon powder or 2 cinnamon sticks (rou gui in Chinese medicine)
½ tsp whole or powdered cloves (ding xiang in Chinese medicine)
1 orange, halved, zested and juiced
½ lemon, zested and juiced
2-4 sticks astragalus (huang qi in Chinese medicine)
¼ cup reishi, maitake, turkey tail, or other immune boosting dried mushrooms
a few TBS elderberry tincture (made by soaking 1 cup dried elderberries in enough vodka to cover for 4-6 weeks).

Method: How to make Elderberry Syrup
- Mix elderberries, water and any other add-ins (except honey and lemon juice) into a saucepan.
- Bring to a boil and then simmer on low heat, covered, for 45-60 minutes, or until liquid is reduced by about half.
- Remove from heat, strain out berries and herbs, mashing the mixture to press out as much liquid as possible.
- Allow to cool at least 10 minutes.
- Add the honey, lemon juice and tincture, if using, and mix well.
- Store in a glass container in the fridge for up to 3 months.
Elderberry Syrup Instant Pot method:
- Put berries, water and any other add-ins (except honey and lemon juice) into your Instant Pot.
- Seal and set to high pressure for 10 minutes.
- Manual release, and then set to “sauté” function for 10 minutes to reduce.
- Strain, allow to cool, and add honey, etc. as above.
Children can take ½-1 tsp per day, and adults ½ – 1 TBS per day. When fighting a respiratory infection, take the normal dose every 3 hours until symptoms resolve.
If you’re sold on the benefits of elderberry syrup, but don’t have time to make your own, you can always order Immunoberry Liquid by Designs for Health (my go-to before I started making my own).
Bone Broth

Bone broth can be an amazing addition to your diet. Gourmet chefs around the world praise its irreplaceable flavor, but I also love it for its exceptional health benefits. Bone broth is one of the easiest, most inexpensive and beneficial additions you can make to your diet.
Simmering bones for a long period of time* with a splash of vinegar helps to extract calcium, magnesium, phosphorus, potassium, iron, zinc, and other trace minerals, as well as collagen and amino acids. The nutrients in bone broth are easily absorbed and help to build strong hair, nails, bones, cartilage, tendons and all of the connective tissue in the body, including in the gastrointestinal tract, and also provide the foundation for a strong immune system.
From a Chinese medicine point of view, bone broth builds the most essential component of the body, the Kidney essence, along with the qi, blood, bones and tendons. Thus, bone broth is an especially useful staple during the winter, and also for those recovering from injury, illness, surgery, or childbirth, and those with chronic joint pain, back pain or generally poor health.
Bone Broth Ingredients:
Bones: Get bones from an animal that was raised naturally (organically if possible), free of hormones or antibiotics, such as beef, lamb, pork, chicken or even fish. Including bones with connective tissue such as feet, necks, wings, etc. will deliver more collagen.
Splash (1-2 TBS) cider vinegar
Optional: Add in any vegetables or herbs you like for flavor and bonus nutrition. I like onions, carrots, celery, garlic and herbs such as rosemary, thyme, parsley, sage, bay leaves, peppercorns, etc.
Method: How to Make Bone Broth
- Optional: If you can’t get organic bones, blanch your bones in boiling water for 10-15 minutes to help remove impurities, and also improve the flavor.
- Optional: Roast the raw or blanched bones at 425 for 20-30 minutes to improve the flavor. Bones that have already been roasted (e.g. ribs, chicken carcass) etc. don’t need to be roasted again.
- In a large soup pot or crock pot (or see Instant Pot method below), cover the bones with at least 2 inches of water, and add a splash of apple cider vinegar.
- Bring to a boil.
- Reduce to a simmer and let the broth cook for 8-72 hours. The longer it cooks, the more nutrients are extracted and the richer the flavor. *Those with glutamate or histamine sensitivity should only consume short-cooked bone broth – up to 3 hours.
- Strain the broth; cool and skim off the fat if desired.
- Broth may be refrigerated for several days, or frozen for several months.
- Use the broth as a base for soups, sauces, gravy, congee, etc. or add a bit when you cook rice or beans or braise meat or vegetables. It’s hard to go wrong with a great base, so experiment and enjoy!
Instant Pot Bone Broth method:
Add bones, vinegar and any additional vegetables or herbs to your Instant Pot and add water to 1-2 inches below the fill line. Seal, then cook on manual high pressure for 120 minutes, and allow to naturally release. Allow to cool, strain, and enjoy!
Other bone broth tips:
- Keep a container in the freezer of meat scraps, bones and vegetable trimmings instead of throwing them away. When you have enough, make bone broth!
- Vegetables, herbs and meat can be added and cooked in the strained broth for a quick and hearty soup.
- Freeze some broth in ice cube trays or silicone molds and use individual cubes to boost the flavor and nutrition of any recipe.
- Different bones will confer different flavor; chicken and beef are good starting points, but experiment and use what you like.
Whipped Body Butter
(Topical use only!)
High quality body butter is easily made at home. Just melt together roughly equal proportions of solid and liquid oils, and then whip the result into a luxuriously silky, hydrating butter that is excellent for protecting skin in our dry Colorado climate. It makes a great gift as well!
Body Butter Ingredients:
- 1/2 cup coconut oil
- 1/2 cup light oil such as olive oil (or almond, jojoba, or avocado oil)
- 1/2 cup shea butter
- 1/2 cup cocoa butter
- optional: 10-30 drops of essential oils of choice
Method: How to make Body Butter
- In a double boiler or saucepan on very low heat, combine all ingredients except essential oils.
- Stir constantly until ingredients are melted. You want it just warm enough to melt the ingredients together, so this may take some time.
- Let the mixture cool for an hour or so in the fridge until it starts to harden around the edges but is still soft to the touch. Add essential oils at this point if using.
- Use a hand mixer to whip for 10 minutes or so until lighter in color and fluffy.
- Store in a jar (ideally glass) with a lid and use as you would regular lotion or body butter.
A few notes on oils:
Because the skin is our largest organ, and it is permeable, I recommend using organic butters and oils if possible. But even if you don’t, this homemade natural body butter is still likely better for your skin and overall health than commercially made lotions with chemical stabilizers and fragrances.
I recommend following the recipe exactly the first time to get the consistency right. If you find the butter is too soft after whipping, you can melt it all together again, and add a bit more cocoa butter. If it is too stiff, you can melt it again with more olive or almond oil. In the summer, your butter will naturally be a bit softer, and firmer in the winter.
Once you have the recipe down, you can play with using other butters and oils. I have used aloe vera butter and mango butter, and also changed the ratios of shea butter and cocoa butter with success. For stiff and sore muscles, you can also include magnesium oil.
Good quality natural butters and oils don’t contain preservatives and therefore will go rancid over time. I keep my raw ingredients as well as most of my finished body butter in the fridge, and just transfer a small amount at a time to a jar in the bathroom.
Disclaimer
None of these recipes nor the claims of the medicinal qualities of ingredients have been evaluated by the FDA.
The information provided here is not intended to serve as medical advice, nor to treat, cure or prevent any disease. Always consult a doctor or qualified health practitioner before taking any herbal remedies, teas, or preparations.
Kate Blalack is a nationally certified acupuncturist and Chinese herbal medicine practitioner in Boulder, Colorado. Kate has a special interest in working with women and families, including acupuncture for fertility, menstrual problems, pregnancy, and postpartum. Contact Kate for more information or to book an appointment at her Boulder clinic.